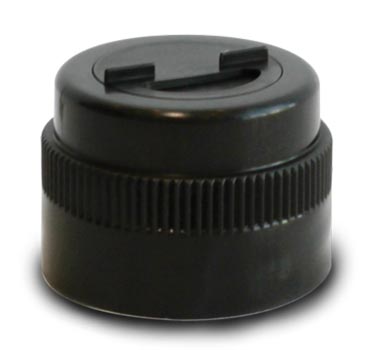
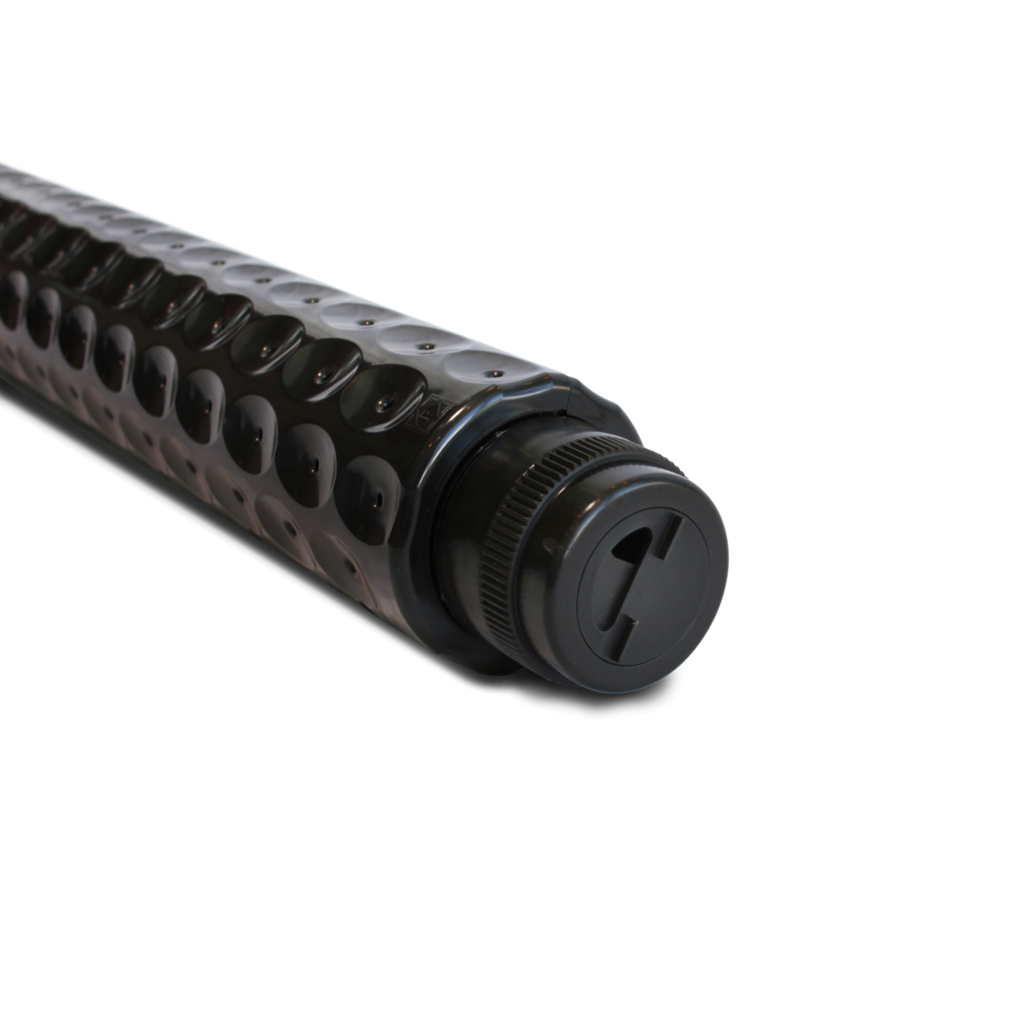
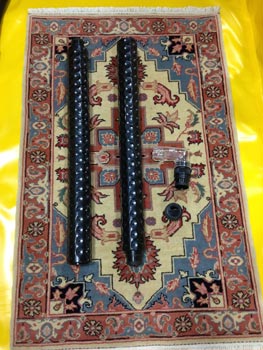
• Four 3-foot Rug Suckers (this web page only)
• 1 swivel sight elbow
• 1 vent cap
*U.S. & International Patents Pending*
Each new set comes with a 6 foot sucking capacity, 2 sets included on this webpage. To achieve MAXIMUM rug sucking ability, (3) sets are recommended for up to 18 FEET of rug sucking power.


INSTRUCTIONS
Prevacuum both sides of the rug two times. I like to sweep under the rug after each vacuuming.
1. The rug MUST be thoroughly and completely wet to function properly. Apply the diluted Kryptonite neutral pH cleaner from your AS08 injection sprayer with on the top of the rug until completely soaked. Agitate with the brush side of the Grandi Goomer or counter rotating brush machine (CRB) until the rug looks clean.
2. Build the Rug Sucker to the closest size to the rug that you will be extracting. A Rug Sucker sticking out from the roll is better than a Rug Sucker shorter than the roll.
3. Place the Rug Sucker on the rug approximately 6-8” from the edge.
4. Attach the Rug Sucker up to the vacuum source (must be capable of 12" of Hg and 250 CFM at the cuff). Turn on vacuum source.
5. Fold the rug over the Rug Sucker allowing the vacuum to grab onto the rug. Tuck the rug and roll as tightly and evenly as possible.
6. For best results, add more water and Krytonite to this first roll.
7. Roll the rug over once or twice and add more water and Krytonite. Repeat this “rolling” action every other roll until you get to the end. The weight of the roll should hold rug end in place. Continue flushing with water or preferred cleaning solution until desired results are achieved.
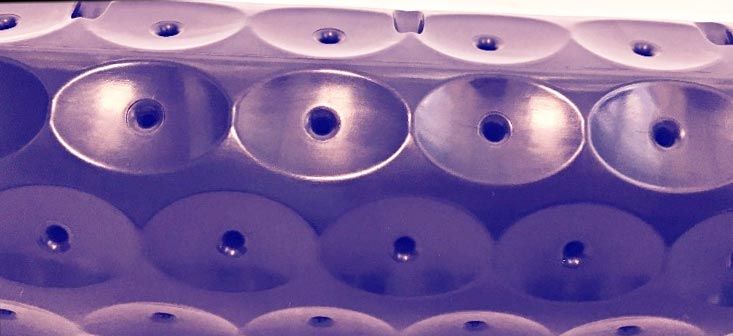
8. It may be necessary to cover any exposed vacuum holes with Sucker Sox (or plastic trash bags, or other plastic).
9. Watch the clear sight elbow for rushing water. Most of the water that is in the rug will be
extracted in the first couple minutes. Start rinsing with clear water only. Usually you can apply the rinse water right off garden hose end sprayer.
10. Once your sight elbow indicates that there are wisps of water moving through the sight elbow
begin unrolling the rug slowly with the vacuum on. The user may slow down or pause if there is
increased water movement. Unroll the rug to the first or second rolls and let it suck for an
additional minute.
*Do not ever lift the rug while rolled around the tool, It is NOT A LIFTING DEVICE.*
Please visit www.ruggedind.com for further information.
TIPS & TROUBLESHOOTING
1. If the sight elbow has large amounts of flowing water, leave the valve CLOSED.
2. If there is pooling water in the sight tube, open the valve SLOWLY until the flow of water
increases. There will come a point when more air than water is moving through the sight tube. If
this happens, close the valve until you get to the point where the water is flowing more. If the water
stops flowing, open the valve and start the process over again.
3. The Rug Sucker works first by extracting the bulk of the water through the use of vacuum in the
first couple minutes. The rest of the water and moisture will be extracted by the air moving
through the rug.
4. Watching the sight elbow is paramount to knowing when your rug is nearing completion of
extraction. Each rug is different. Each vacuum is different. Average prespray time with Krytonite is 10 minutes. Average Rinse time 10 minutes. Followed by extraction time with the Clean Storm Goliath with 2" hose at 50 ft is and additional 10 minutes. This machine will pull 12" of Hg and 250 CFM at the cuff that connects to the Rug Sucker. This may vary based on the vacuum being used.
5. Rolling the rug is important. Whether rolling it sideways or longways, make sure that the pile is
laying TOWARDS the user / fringe as you roll allowing the rug to tighten around the tool as it is rolled. The
fewer rolls to extract, the quicker the extraction time. The width should not matter unless an
underpowered vacuum is being used. The benefits to sideways are: Fewer rolls to extract, more
even drying of fringes, prevents fringes from dying if rug is a bleeder.
6. If the rug is almost exactly the size of the Rug Sucker, there may not need to use Sucker Sox to
cover the ends. Covering the ends has one purpose, to concentrate the suction THROUGH the rug. If
the user hears or feels vacuum loss on either end, take steps to cover those areas with Sucker Sox.
7. The outer layers will always be dryer than the inner layers. Unrolling the rug more slowly with
the vacuum on can alleviate this but not necessary. However, allowing the final roll or two to
receive an additional minute of vacuum time can decrease the uneven drying that will occur by
simply shutting the vacuum off and unrolling the rug. Allowing it some one-on-one vacuum time
can avoid browning (wicked dirt) to the fringes.
8. Never let an area rug dry on its own. Always force dry with air movement with dehumidified air. Different drying technique can be to dry up side down flat with air movers blowing air on the back side. This will assist it pulling any remaining dirt that did not flush out to the back of the rug. Do not allow the area rug to dry in the sun unless you want the rug to change shape. Sun drying will shrink natural fiber rugs. Synthetic rugs will not shrink in the sun. Please note that all pile grooming will need to be completed before the rug is allowed to dry all the way. You can dry rug hanging in the air. You can use chain through steel pipe and then place this pipe though 6" diameter PVC pipe to make a gentle turn over the steel pipe. You can rise and lower this pipe with Come-A-Long ratchets or electric wenches. Once hanging in the air you can groom and blower dry with a hair drier and horse hair brush. The goal of the pile is to face straight out of the back of the rug. If you are going to let the rugs dry flat on the floor do not place air mover under the rug as this will cause the rug to flap in the wind and will break the backing of the rug.
9. I never concentrate on fringe cleaning until the rug is dry (day two). Fringe cleaning is performed best with the rug handing in the air, but can be perform being draped over a board or large pvc pipe.
To use on cotton fringes:
Clean both sides of the area and fringes, groom and force dry with air movement and dehumidification.
The next day, apply neutral pH cleaner on fringe. Then pressure wash the fringes only with a fan tip lance (40 degree or wider) with a board clipped behind the fringes at about distance of 1" per every 100 psi on your pump while the rug in hanging in the air. Example 1000 psi is a distance of 10" from the fringe to the tip of the lance. Vacuum water out with you hand tool and while the fringe is still damp, trigger spray a mist of the non Yellow Out on both sides of the fringes. Set back in your drying room. Fringe will dry bright white!
Tip: I like to use a sheet rock mud spreader as a shield to help prevent the Yellow Out from hitting the wool (not OK). Do not apply on dry fringes or over use!
You can add quick disconnects to the AS08 sprayer so you can use the spray gun directly off the Goliath extractor and change out the tips.
The Goliath would require a 4002 tip to rinse at 450 psi (5" from the surface). Current included tip on the AS08 sprayer is usually 6506.
Another great tip to use is the
When cleaning the fringe is is super important to not clean the rug or hit the rug with the cleaners, chemical, rinse water, or Yellow Out.
You will the water pressure push the dirt off the fringe. I operated an area run cleaning plant for 20 years and tried many different ways to clean fringes, and the above way is the only way the really works well.
Some area rug cleaning shops set up a 24+ CFM @ 175 psi air compressors in their shop. Using different tips you can use the air to blow out dry dirt as well as blow the water out of the rug and fringes. Note in order to get 24 CFM you will need four 120 volt air compressors, or one 3 phase 240 volt, or two single phase 240 volt air compressors.
Optional:
WARRANTY
LIMITED WARRANTY POLICY
Rugged Industries endeavors to provide high quality products and product support to its customers and therefore backs up all of its new products purchased from Rugged Industries or any authorize distributor with this limited warranty. Rugged Industries warrants against all manufacturer’s defects, defects in workmanship and defects in material only.This limited warranty begins on the date of the customer purchase and is valid and available to the original purchaser only. Rugged Industries are for commercial use only and are not intended for personal, family, or household uses.
However, other than set forth herein, Rugged Industries gives no warranty, express, or implied, as to description quality, merchantability, fitness for any particular purpose, productiveness, infringement, or other matter, of any goods which Rugged Industries shall supply. There are no warranties which extend beyond the description on the face hereof. Rugged Industries shall in no way be responsible for the proper use and application of the goods. Rugged Industries neither assumes nor authorizes any other person to assume for Rugged Industries any other liability in connection with the sale of Rugged Industries goods. This limited warranty policy may be changed or withdrawn by Rugged Industries at any time without notice.90-Day Part and Labor Limited Warranty
Rugged Industries will cover parts and labor on all products for 90 days from the date of original purchase. This warranty covers the cost of replacement only and does not cover shipping costs.
Limitation of Damages
The remedy of replacement or repair of any defective goods shall be the exclusive remedy under any warranty made by Rugged Industries, whether express or implied. In no event shall Rugged Industries by liable for any incidental damages, or personal injuries.
All limited warranties are void for, and Rugged Industries does not warrant in any way, any product that evidences misapplication, improper installation, abuse, lack of maintenance, negligence in use or care, abnormal use, alteration of design, use of incompatible or corrosive chemicals, use in a rental service, and/or servicing, installation of parts, or repairs by anyone other than Rugged Industries or a Rugged Industries authorized distributor. Rugged Industries may make changes in products it manufactures and markets at any time; these changes are made without obligation to change, retrofit, or upgrade any product previously sold or manufactured.
Rugged Industries has no obligation to honor the limited warranties set forth herein unless the original purchaser, promptly upon discovering the warranty claim and prior to continuing to use the product, contacts Rugged Industries or a Rugged Industries authorized distributor or to describe the claim and to receive and follow instructions for documenting and resolving the claim. In addition, the purchaser must provide the product to which the claim applies to Rugged Industries or a Rugged Industries authorized distributor for a thorough inspection. Rugged Industries does not warrant or honor work not performed by an authorized distributor.
If any provision or portion of this limited warranty policy is found to be unenforceable, then the remaining provisions and portions shall remain valid and enforceable. If any provision or portion of this limited warranty policy is found to be limited by law, then that provision or portion shall be construed to make it effective within the bounds of law. For example, if there are legal limitations on the duration of warranties, the warranties made herein shall be construed to have the minimum duration required by law, or, if there are legal limitations of exclusion of remedies, the exclusions made herein shall be construed to apply to the fullest extent possible without violating the law.
The validity, construction and performance of this warranty policy shall be governed by the laws of the State of California, without respect to conflicts of laws principles. The exclusive jurisdiction of any legal action arising from or related to this warranty policy shall be in the State of California and no legal action shall be commenced elsewhere.


